Saturday 9 May 2015

మన్యంలో మళ్లీ బాక్సైట్‌ ఉద్యమం.

మన్యంలో మళ్లీ బాక్సైట్‌ ఉద్యమం.. అల్లూరి వర్ధంతి నాడు విల్లంబులతో కదంతొక్కిన గిరిజనం
చింతపల్లి, మే 8: విశాఖ మన్యంలో బాక్సైట్‌ సెగ మళ్లీ రాజుకుంటోంది. తవ్వకాలు జరవద్దంటూ ప్రజాప్రతినిధుల ఆధ్వర్యంలో గిరిజనులు ఉద్యమాన్ని ఉధృతం చేస్తున్నారు. ప్రజల పక్షాన బాక్సైట్‌ తవ్వకాలకు వ్యతిరేకంగా పొరాటం చేయాలని, లేదా తీవ్రపరిణామాలు ఎదుర్కోవాల్సి వస్తుందని కొంతమంది స్థానిక సంస్థల ప్రజాప్రతినిధులను మావోయిస్టులు హె చ్చరించారు. దీంతో వారంతా గురువారం అల్లూరి సీతారామరాజు వర్ధంతి నాడు ఉద్యమానికి శ్రీకారం చుట్టారు. పెదవలస, జర్రెల, సప్పర్ల గ్రామాల్లో వందలాది మంది గిరిజనులు బాక్సైట్‌ తవ్వకాలకు వ్యతిరేకంగా ఉద్యమాన్ని ప్రారంభించారు. గిరిజనులు సంప్రదాయ ఆయుధాలతో కదంతొక్కారు. ప్రాణాలు అర్పించైనాసరే బాక్సైట్‌ తవ్వకాలను అడ్డుకుంటామని గిరిజనులు నినదించారు. ఐదేళ్ల క్రితం బాక్సైట్‌ తవ్వకాలకు అనుకూలంగా పనిచేస్తున్నారని ఆరోపిస్తూ జీకేవీధి వైస్‌ ఎంపీపీ సాగిన సోమలింగం, చింతపల్లి జడ్‌పీటీసీ సభ్యుడైన నాటి జిల్లా పరిషత్‌ ఉపాఽధ్యక్షుడు ఉగ్రంగి సోమలింగాన్ని సీపీఐ మావోయిస్టులు కాల్చి చంపేశారు. ఏజెన్సీలోని అన్ని పార్టీల నాయకులు, ప్రజాప్రతినిధులు పదవులకు రాజీనామా చేసి బాక్సైట్‌ వ్యతిరేక ఉద్యమంలో పాల్గొనాలని అల్టిమేటం జారీచేశారు. దీంతో పలువురు తమ పదవులకు రాజీనామా చేస్తున్నట్టు ప్రకటించి, బాక్సైట్‌ వ్యతిరేక ఉద్యమంలో పాల్గొన్నారు. మావోయిస్టుల హెచ్చరికలతో రెండేళ్లపాటు ఏజెన్సీలో స్థానిక పాలన స్తంభించింది. ఈ తరుణంలో చింతపల్లి పర్యటనకు వచ్చిన అప్పటి కేంద్ర మంత్రులు జైరాం రమేష్‌, కిశోర్‌ చంద్రదేవ్‌, రాష్ట్ర మంత్రి బాలరాజు... బాక్సెట్‌ తవ్వకాలు జరగవని, గిరిజనులు ఆందోళన చెందాల్సిన పనిలేదని చెప్పడంతో ఉద్యమం చల్లారింది. నాలుగేళ్ల నుంచి మన్యంలో బాక్సైట్‌ వ్యతిరేక ఆందోళనలు దాదాపు జరగలేదు. రాష్ట్ర విభజన అనంతరం అధికారంలోకి వచ్చిన టీడీపీ... బాక్సైట్‌ తవ్వకాలకు చర్యలు చేపడుతున్నట్టు ప్రచారం జరగడంతో గిరిజనుల్లో మళ్లీ అలజడి మొదలైంది. మరోవైపు మావోయిస్టులు తెరపైకి వచ్చారు.

Tuesday 5 May 2015

10 Secrets to Shooting Great Wedding Videos

10 Secrets to Shooting Great Wedding Videos

http://www.videouniversity.com/articles/ten-secrets-to-shooting-great-wedding-videos/

Have you wanted to use your camcorder and video equipment to make some money, or are you already shooting live events? Shooting great wedding videos is a smart great way to profit from your equipment and experience. Whether you’re just entering the videography field or looking to add wedding videography to your list of services, these 10 insider secrets will help you produce professional wedding videos, right from the start.

The tips below are excerpted from The Video Guide to Professional Wedding Videography. This new 2014/2015 version is available in Blu-ray or as two DVDs.

Shoot and Edit Professional Wedding Video

Guide to Professional Wedding Videography

This ten part video guides you through all the steps you need to follow to produce a client-pleasing $1000 plus wedding video. The entire video is in HD. Expert instructors show professional ways to plan, shoot and edit a wedding video that delights clients. Extensive instruction on how to do professional audio, shooting, equipment choices, editing, tapeless workflow, backup and much more.

1. Choose the Right Gear.
Video equipment becomes obsolete very quickly because of the constant advancements in technology. You don’t need the highest-end gear to shoot great wedding videos; the basics will do just fine. The basic equipment that you’ll need to shoot wedding videos includes a fluid head tripod, remote microphone system and or audio recorders. Oh, and an HD camcorder, of course.

2. Back up your audio.
Audio for wedding videos can be touchy. Remote microphones may pick up some voices better than others and last minute glitches could prevent you from getting any audio at all. This is why many wedding videographers are investing in audio recorders to back up their audio. They are also affordable enough that you can have several for micing various audio sources. Just like a wireless mic, the audio recorder is easily carried in the groom’s pocket, with a lavaliere microphone.

3. Understand LUX Ratings.
LUX is a measurement of camera sensitivity that is important to consider when purchasing a video camera. Cameras with lower LUX ratings produce better video in low light situations than cameras with higher LUX ratings. For wedding videography, which most often takes place in low light situations; churches, synagogues, reception halls, it is necessary to use a camera with a low LUX rating. The more sensitive to light your video camera is, the better quality wedding shots you’ll get, and the more professional the finished wedding video will be.

4. Attend the rehearsal.
Attending the wedding rehearsal, is very important especially if you are just starting out. For others seeing the rehearsal helps you avoid problems with lighting, microphone placement, and blocked views. The rehearsal also gives you another chance to consult with the bride and groom. Any last minute requests for their wedding video that they, or you, may have can be discussed before the wedding day rush is on.

5. Get “B-roll” coverage.
“B-roll” coverage is of critical importance to the professional quality of your wedding video production. To get B-roll footage, simply use a tripod to take exterior shots of the building in which the event will take place, stained glass or other architectural features, the food and flower arrangements and any other special touches you notice.

In addition to these still shots, begin shooting about 20 minutes before the wedding is to begin, in order to get shots of the guests being seated, and audio of the music played before the ceremony.

Even if you’ve been shooting network TV shows for decades, shooting a wedding is harder than you may think.

Go to Page 2 for more Wedding Video Tips

- See more at: http://www.videouniversity.com/articles/ten-secrets-to-shooting-great-wedding-videos/#sthash.kf5XUGBF.dpuf


This ten part video guides you through all the steps you need to follow to produce a client-pleasing $1000 plus wedding video. The entire video is in HD. Expert instructors show professional ways to plan, shoot and edit a wedding video that delights clients. Extensive instruction on how to do professional audio, shooting, equipment choices, editing, tapeless workflow, backup and much more.
6. Test your audio.
Testing your audio before the ceremony is the best way to avoid common audio problems. To test your audio, make sure to arrive at the wedding location at least two hours early, in order to set up your equipment and check it out, and have time to fix any problems that you find. Another good tip is to monitor the audio with your headphones to be sure that it has a professional quality. Unfortunately, audio recorders, unlike wireless mics, cannot be monitored.
7. Concentrate on close-ups.
It is extremely important to get close-up shots at the wedding. Close-ups make your images look sharper and they allow you to capture emotion in your wedding video. Be sure to get close-up shots of the bride and groom, the wedding party, and the parents throughout the wedding and the reception, and use them frequently.
8. Anticipate and follow the action.
In order to shoot a professional wedding video, you must anticipate and follow the action throughout the wedding, especially if you’re doing a one-camera shoot. You only get once chance to capture the action at a wedding ceremony, be prepared for whatever is coming. Talking to the couple and attending the rehearsal ceremony will help you to know what’s happening next, and your camera moves will be more fluid. Anticipating and following the action is key to shooting a professional wedding video.
9. Focus on capturing the event, by creating a memorable documentary of the day’s events.
Special effects are no longer popular in wedding videography, except for a bit of slow motion. Titles are rarely used in wedding videos these days. It is very important to remember that shooting a wedding video is all about capturing an important event, not creating a video with the most special effects. Remember to keep your focus on the couple, the ceremony, and the emotion of the wedding, and tell the story of their day. Later you can add a short “highlights” film of 2 or 3 minutes which becomes part of the video.
10. Finish the job on time.
After you’ve shot the wedding ceremony and the reception, it’s time to produce the finished video. Make sure to allow at least a week of postproduction to finish the job on time. A week should give you time to transfer footage to your system, catch up with other possible clients, editing the ceremony, the reception, and the pre-and-post ceremonies, as well as transferring to tape or DVD and preparing the packaging. Remember that the MOST important part of post-production is delivering the finished video ON TIME. The married couple will be anxious to see their wedding video, and are depending on you to deliver it on the date and time that you promised. Your reputation, and your future clientele, depends on your ability to finish like a pro by producing a professional wedding video on time and on budget.
These tips are excerpted from The Guide to Professional Wedding Videography Available as DVDs or Blu-ray.
- See more at: http://www.videouniversity.com/articles/ten-secrets-to-shooting-great-wedding-videos/2/#sthash.t3m9ulcs.dpuf

Top 10 Video Tips for Professional-Looking Results

Top 10 Video Tips for Professional-Looking Results

Young Man Shooting HD Video - Cavan Images/Taxi/Getty Images
Cavan Images/Taxi/Getty Images
Whether you aspire to become a media videographer or just want to know how to shoot professional-looking videos, you need more than good equipment. These top 10 video tips will give your work an instant boost in quality, giving you professional-looking results every time.

Video Tip #1: Shoot Steady Video

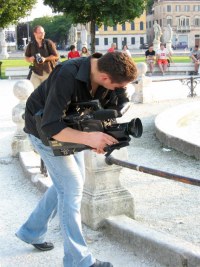
A tripod is the easy answer to producing steady video, but avoid becoming dependent on it. You can shoot steady video without lugging around a lot of gear.
Get your body in position so that every breath you take doesn't lead to unwanted camera motion.
 
Use the ground, a wall or other object to brace the camera and get interesting visual perspectives. By ditching the tripod, you can move around a scene without being anchored in one spot.

Video Tip #2: Produce Creative Shots

Producing interesting videos involves learning creative shooting techniques. You don't want your videos to look as though they came from a surveillance camera.

A beginner tends to shoot everything from the corner of a room or away from the action. By putting yourself in the middle of what's happening, you will get images that aren't possible from a distance. Experiment with different angles by shooting above and below your subject.

Video Tip #3: Practice Widescreen Videos

The videos of tomorrow will all be 16x9 widescreen. Think of how you can make this extra visual space work for you.

You can capture much more content in a single shot. But remember that widescreen video doesn't mean shooting all wide shots. Television is still an intimate medium. Closeups of faces will convey more emotion than a group shot of a crowd.
 

Video Tip #4: Avoid Unnecessary Zooms and Pans

Picking up a camcorder for the first time has just about everyone wanting to hit the zoom button on every shot while panning across the horizon. The result can leave viewers seasick.
If you're recording an action scene, let the motion that's happening naturally dominate your video. Stop yourself from adding random zooms and pans, which distract from the action.
Make sure there's a reason you are zooming or panning. At a sports event, professional videographers follow the action by following the ball. That's the motivation behind tilting the camera up when a baseball player hits a fly ball or panning during a double play.

Video Tip #5: Get Good Results When Shooting Outdoors

You'd think outdoor videography would be simple because the sun provides the lighting. But to get the best outdoor shooting results, you have to watch the position of the sun closely.
 
Shoot with the sun at your back. If you're recording people, they may complain about looking directly into the sunlight, but tell them that the shots you'll get will be much better than if you were shooting into the sun. That would put their faces in silhouette.

Video Tip #6: Prepare for Indoor Video Shooting

Ignoring lighting when shooting indoors can make your videos look dark. That's whyindoor video shoots require additional preparation.
Adding your own lights is ideal. If that's not possible, check out the available lighting sources. If you're shooting video of people, get as much light in their faces. But don't be fooled by overhead lights. While they may be bright, they only light the tops of people's heads, leaving their facial features shadowy.

Video Tip #7: Position Lights for the Look You Want

Using television lights will give your videos a crisper look. But good lighting involves more than blasting your subject with as much wattage as you can find.
Knowing where to position lights makes all the difference in getting a natural effect versus making people look as though they're about to undergo surgery.
Besides the standard 3-light setup, experiment to get dramatic effects. Turn out all the lights in a room and use only your equipment to highlight what you want.

Video Tip #8: Compose Creative Interviews

At some point, you'll want to shoot video of a person talking into the camera -- it could be a sit-down news interview or just a conversation with a person on the street. Plan the interview shoot to deliver professional results.

Consider the background. If you're talking to someone about traffic in her neighborhood, show cars in the distance. If you're interviewing a father about the day his child was born, put him in a cozy setting, like near a fireplace.
Then decide how tight you want to shoot the interview. There's the standard head and shoulders look. But you may want to interview a farmer on his tractor, with much of the tractor in the shot. A highly emotional interview should be shot tight, so you can really see into the person's eyes.

Video Tip #9: Remember to Capture Good Sound

While capturing compelling video, don't forget that good audio is a must. Otherwise, your video may turn out useless.
 
The two most common mistakes are to forget to record audio and to fail to monitor the sound you're getting. Forgetting to record audio means a child's birthday party is silent -- you can see the other children singing and laughing, but without hearing it, the video is ruined.
Monitoring the sound helps you avoid recording unwanted audio. That can happen when you interview someone and don't notice that you are standing near a loud air conditioner. When you watch the video later, all you hear is the hum of the A/C unit, which drowns out what the person was saying.

Video Tip #10: Add a Green Screen to Produce Special Effects

Using a chromakey green screen gives you a world of options. These are the same tools TV stations use to present the weather. The meteorologist stands in front of the green screen, which allows the weather maps to be superimposed behind him.
You can shoot a person remembering her high school graduation while video of the graduation plays behind her. It's an easy way to combine two video sources into one shot.
Mastering these video tips will ease the frustration many videographers experience. Before long, the standard tricks will become so routine that you'll be able to concentrate on creativity and not just the basics.

Top 10 tips for shooting video:

Top 10 tips for shooting video:

Whatever the reason for turning on your camcorder, you'll want to record footage that will be as easy to edit as possible. Follow these simple rules and you can't go wrong...
1. Plan your shoot
Nothing gives you a better chance of getting the shots you want than knowing what's going to happen where and when. Be as clear as you can about what you need to get before you arrive and you're far less likely to miss the most important moments.
2. Stand securely
Stand squarely with your feet apart and both hands on the camcorder to steady it. When you move the camera, move it smoothly and with purpose. Decide before you move where you're going to stop and really concentrate on steady unhurried movement. Don't overuse the zoom and if in doubt, don't move.
3. Avoid long zooms
The more you zoom in, the more wobbly your shots will be because at high zoom levels, the slightest movement is magnified. Try to simply get closer to your subject and if you can't do that, brace yourself against a solid object.
4. Get a mixture of shots
Shoot a mixture of long shots and close-ups. Get panning shots which cover the whole event as well as focusing in close on the main event. If your entire video is made up of the same kind of shots, it will quickly get boring.
Pinnacle Life5. Think in scenes
You're going to be editing your day's filming in Pinnacle Studio, so think about that when you're shooting. Decide how you're going to edit and make sure you have all the shots you need to tell the story you want to tell. Big wide shots set the scene well while close-ups allow you to focus attention on the main action.
6. Over-shoot
Turn on the camera a few seconds early and don't stop filming until a few seconds after you think the shot is over. That way you always have "room" when editing to cut or fade into and out of your shot.
7. Watch out for shot killers
Your camera will automatically adjust its exposure whenever you move between dark and light areas so avoid filming in front of windows and lights or turn off the auto-exposure feature. Likewise, if there's a lot of movement in the shot, turn off autofocus and set the focus manually.
Pinnacle Life8. Looking room
If you're filming a person and they're looking to the left or right, move the camera to give them a little space in front of their nose to look into. If you frame them so they're face to face with the edge of the screen, the shot won't look balanced.
9. Eyes on a third
When you have people as the main focus of the shot try to balance the shot so that their eyes are a third of the way down the screen. That way, however you frame the shot, it will always look balanced.
Pinnacle Life10. Get cut-aways
Don't just shoot the action. Get the occasional shot of people's reactions to whatever you're filming. Try to grab the odd shot of a piece of local architecture, or objects in the same room. You'll be able to use these shots later when you edit to cover cuts you make in the main action or moments when main shot doesn't quite work

Top 10 Videography Tips

Top 10 Videography Tips

Simple tips for shooting documentaries,
news, reality television and web video

Videography Tips:
Shooting documentaries is part technique and part instinct. Depending on the type of documentary you're shooting, you may have to shoot on the fly "following the action" or everything may already be planned out in advance -- for example a historical documentary where you're shooting a lot of "talking head" interviews.
No matter what type of documentary or video you're shooting, here are some basic tips to follow.

Top 10 Videography Tips

1. Steady Eddie - Keep the camera steady. If possible, use a tripod. Don’t constantly zoom in & out or pan right to left. In general, you want to record at least :10 of each shot. Let the action in the frame speak for itself. You will thank yourself once you’re back in the editing room.

2. Wide, Medium, Close-up - For every scene or event you’re shooting, make sure to get different angles so that you’ll have choices in the editing process. For example, if you’re videotaping a protest, get the widest angle possible (perhaps on top of a building looking down on the crowd), then get close-ups of the faces in the crowd and then some medium shots of people from the ground level. Again, don’t forget the :10 rule for recording each shot.
3. What’s in the background? – When you’re shooting an interview or a speech, make sure to notice what's in the background. You can either move the camera to get the best angle, move the subject in front of a good background or create a new background. Ask yourself, does this background "support" this story visually?" Is it a good backdrop for what is being discussed?
4. Timelapse – time-lapse is one of the most visual and fun ways to capture an event or story. Before heading out for a shoot, think about whether the story could lend itself to a time-lapse shot. Various video cameras these days are equipped with special time-lapse settings. If they’re not, just set the camera up on a tripod and let it roll. You can always speed up the footage in editing later.
5. Lighting – The same rules that apply to photography, apply to videography. Always make sure your subjects are well lit (but please, not “over-lit”). As an example, don’t put an interview subject with their back to the sun. Or don’t put them under a shady tree with a bright scene in the background.
6. Anticipate action – This is one of those lessons that almost cannot be taught. It’s a skill that develops instinctively the more you shoot. Once you miss a few “money shots”, you’ll learn to start paying attention. A simple example of this is a baseball game. If you want to capture a player hitting the ball, you will need to anticipate that moment and begin recording a few seconds or minutes before. Once you realize the ball has been pitched, it’s too late. You’ve missed the moment.
7. Frame it like a picture – This is where artistic expression and style come into play, but in general, utilize the standard framing styles and rule of thirdsin photography.

8. Where’s your mic? – Many amateur videographers or budget filmmakers don’t have the luxury of having an audio tech to hold a boom mic for them. Often the case in budget filmmaking, you are relying on the mic on top of your camera for sound. If that is the case, you will need to always be conscious of where that mic is relative to the sound you are trying to capture. If someone is talking, you will need to have the camera very close to that person, otherwise it will be annoying for the viewer to strain to hear what they are saying. The reality is that getting good sound will often dictate your shot. Learn some audio basics along with videography tips.
9. Don’t zoom for close-ups – In general, an image loses quality when you zoom. An image also tends to be shakier, especially on a hand-held shot, when zoomed in. So whenever possible, take your two legs and walk up to whatever it is you want a close-up of. It will look much cleaner and more professional.
10. Don’t overshoot (or then again, go ahead) – A common tendency for amateurs is to shoot anything and everything. Since they don’t know what they’re doing, they err on the side of overshooting. In general, I have found that for every hour of professional footage, I end up using about a minute in the final production. (So for ten hours of shooting, I end up with a great 10 minute video).

How To Shoot Video That Doesn't Suck

Bonus Videography Tips

  • Copy, copy, copy – When you’re starting off and have no idea what you’re doing, please COPY someone else’s style that you like. Study it, examine it and copy it exactly! Eventually, you will start to create your own style, but this is a great way to develop and learn professional techniques.

  • Practice, practice, practice – As with any profession, being a videographer is all about the thousands of details that you can only learn by doing and experiencing first hand. The best way to learn is to make mistakes. So go out there and get shooting!

  • Always have plenty of charged batteries and extra tapes on hand – Enough said.

  • Hide wires – Tuck them out of view, otherwise it looks sloppy and unprofessional.
The above videography tips are based on my personal experience as a shooter/editor and also a producer/director who has worked with and hired many videographers over my 20-years in the video production and filmmaking business.
I hope these videography tips were helpful!